A Progression Through Astrophotography
Night sky photography is a broad and extensive subcategory of photography, one that you can dedicate your whole life to if you wanted. Even as a niche itself, within astrophotography there are many specialities and technical variations that you can spend hours and hours on.
Even if there are many different topics, my guess is that most astrophotographers took a similar path and their journey shares many similarities. This post explores some of those topics and describes what my personal journey has looked like so far.
This might help guide some beginners along their way while more advanced astrophotographers can see how different or similar their path was.
The Starting Point
The first step in astrophotography comes usually as a byproduct of landscape photography. Maybe you’re on vacation or just somewhere out in nature taking pictures. Then, daylight fades, night begins and you decide to take a long exposure after dark. And behold, you get a nice dark landscape with a sky filled with bright stars.
To me, this is the key decision point whether or not someone gets into astrophotography or not. At this point you will be fascinated by the night sky and the images you can take of it. Either that or you dismiss it due to a lack of interest, think it is too much effort or it just doesn’t fit your workflow, style or taste.
For me this moment was in 2014 during a trip to the Canadian Rockies. Photography was still a way of documenting my travels back then, so my compositional and technical skills were nearly non-existent. One night we went a bit outside of Banff and I took a long exposure of Mount Rundle and the night sky. At that time I didn’t know the milky way was faintly visible in my photo but the amount of stars surprised me.

After that first star photo I was hooked, although back then I had absolutely no idea how to properly photograph the night sky. I did not know when and where the milky way would be, things such as galaxies or nebulae were only concepts I’ve heard of and my post-processing skills were no match for a good astrophoto.
The first time I actively wanted to photograph the milky way wasn’t until 2016. I did have a bit more knowledge, only enough to know the milky way is visible in the summer and somewhere in the south. So I went outside, looked in the sky for a bright band, pointed my camera at it and pressed the shutter.
As you can imagine, the result was far away from being a good photo. But the joy of capturing something that thus far was an abstract concept for me was more than enough to get me excited. That joy is probably a universal feeling for anyone who took their first photo of our galaxy.

Studies suggest that many people have never seen the milky way and with the growing amount of light pollution, this will only get worse. For all those people, the milky way is one of those things they might have seen before on a nature documentary but never thought they could see or photograph themselves.
Combining Earth and Sky
Now that I knew I could successfully take an image of the milky way came the point where I actively started to inform myself about the night sky. I started reading when and where exactly the milky way was visible, what the best camera settings were or what lens I should use. Probably the same Google search queries every beginner uses when starting with night photography.
After a while I felt confident enough to plan my first real nightscape image. The amount of planning I did in 2016 compared to the amount I do nowadays is miles apart. I knew the rough direction and time the milky way core would rise and that’s about it. Together with a friend of mine we hiked to the top of a mountain, laid out our sleeping bags and waited for the darkness. Around midnight I got up, set up my tripod and took my first nightscape with a somewhat meaningful composition.

Around the same time I was experimenting with star trails. Earth’s rotation creates the illusion that the stars move across the sky. If you’ve ever spent a few hours in the dark, you will have noticed that the constellations (for example the Big Dipper or Cassiopeia) have changed their orientation. If you take many photos over the course of a night and combine them together into one image, you get these streaks across the sky, where stars moved through the frame. Star trails photos are pretty easy to create and a fun exercise, especially since you can also turn them into a timelapse.
They way star trails look will be different depending on your latitude and the direction you’re facing. Generally speaking, in the northern hemisphere you will get circular trails (around Polaris) towards north, long elongated curves towards south and diagonal trails towards east and west. On the southern hemisphere this is inverted.

The next step up from there was to take a panorama image of the milky way arc. At my northern latitude the milky way arches relatively low on the horizon from south to north in spring, gradually becoming steeper until it arches directly overhead from southwest to northeast in summer and autumn. The difficulty for such photos lies in finding a composition that works well as a 180° panorama.
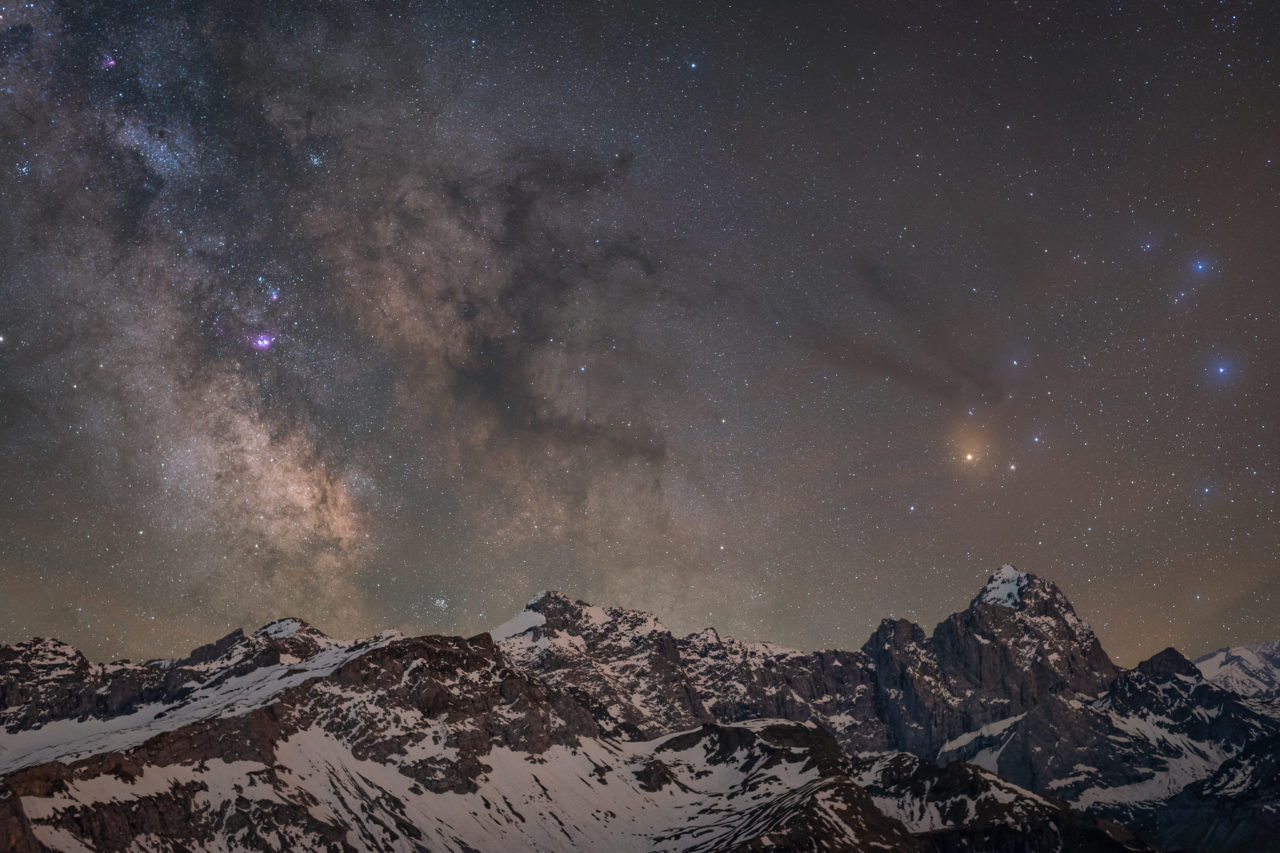
There are several areas of interest in the milky way arc: The bright galactic core, the colorful Rho Ophiuchi cloud complex, the cygnus region with its red emission nebulae, as well as three close-by neighbour galaxies: Andromeda (northern hemisphere) and the Large and Small Magellanic clouds (southern hemisphere). The foreground should help to balance the panorama with these areas otherwise the image will not work.
While many locations lend themselves as single nightscape images, I find it much harder to compose a good milky way panorama. In the northern hemisphere, you need to be facing east, with clear skies from north over east to the south and preferably low light pollution. Having the core in the south means the primary foreground element should more be towards east or northeast. The southern hemisphere has a lot more options, with the milky way arc changing position throughout the year

Improving Quality
These are the basic compositional choices for night sky images and I feel many photographers stop at this point. For good reason: the results can be stunning and the effort required is moderately low. From here on out, more tools or equipment are needed and it gets increasingly technical.
When done right, a single exposure is enough for a gorgeous nightscape image. However, even under the best conditions, a single exposure will contain a significant amount of noise and the detail in the night sky is limited by the exposure time and aperture. To improve the image quality, there are three methods: Stacking, tracking and using a longer focal length.
Stacking an image refers to the process of taking multiple consecutive images and merge them in post-processing (e.g. in Photoshop or a dedicated astro-software such as Sequator). This reduces noise and increases detail in the sky, since each image will have received slightly different data on the sensor. Taking the average of this varying data cancels out part of the noise and enhances features in the sky that were previously hidden behind that noise.

Tracking means putting a star tracking device between the camera and the tripod. This device rotates the camera around the same axis and at the same speed as our planet, keeping the stars pinpoint sharp during longer exposures. Longer exposures means more light reaching the sensor and therefore more details and less noise. The disadvantage here is that the foreground becomes blurry, so a second, non-tracked image of the landscape must be blended together with the sky image.

By using a longer focal length you will reduce the maximum exposure time without star trailing but it will also capture smaller details. And by stitching multiple images with a long focal length into a panorama, the noise will be less visible due to the larger image size. My go-to focal length for this is my 50mm f/1.8 lens, because that is my longest prime lens. The longer you go, the more images you need to capture and stitch. Ian Norman from Lonely Speck has written great articles about this topic here and here.
Of course, combining these methods will result in an even better image quality. If you wanted the absolute best image, you would be doing a stacked and tracked multi-row panorama with a long focal length. I’ve never done all three methods, simply because it is a huge amount of work and a small mistake can ruin the entire image and hours in the field. Typically I would use tracking and stacking for single images because it’s easier to do and less error prone. For larger images (such as panoramas) I would use my 50mm and do a tracked panorama without any stacking. Doing a panorama on a star tracker isn’t as simple as rotating the ball head because the camera rotation changes wiht every minute. The orientation of each frame needs to be adjusted by hand using the stars in live view as a reference. It’s easy to slightly misalign one of the frames and make it impossible to stitch the panorama together. This has happend to me multiple times in the past, so I’m extra cautious about leaving enough overlap between.
Venturing Deeper
So far I have been talking about widefield astrophotography. There is no clear definition of this term but generally speaking, widefield refers to images that show a relatively large field of view of the night sky. The opposite of this is deep sky astrophotography, where the focus lies on one or more tiny objects in the sky.
I got my first taste of deep sky astrophotography in 2018 in Australia. The Large and Small Magellanic clouds are two small galaxies orbiting our own galaxy. They are large and bright enough to be easily seen with the naked eye, but only on the southern hemisphere. I took several images of them with a 50mm lens and I relived that same feeling I had when I took my first image of the milky way.
Since then I have done more research on deep sky objects (DSOs) and found that there is a surprisingly large number of objects that can easily be photographed with a simple star tracker and a telephoto lens. I used to think you needed a big telescope to see these things, not just a DSLR and a lens I already had. Obviously capturing distant galaxies, nebulae and star clusters requires a lot of image data, meaning some objects need hours of total exposure time to be really visible. Brighter ones such as the Orion or Carina nebula or the Andromeda galaxy can be photographed with only a few minutes of exposure. The more the better applies very well here.

I knew from the beginning, I would not just want to photograph DSOs by themselves. Images of distant galaxies or colorful nebulae are gorgeous but I wanted something more. Indiviual images always felt a bit disconnected to me, there was something missing to really build a connection. Showing them together with the landscape we know creates a connection between us and the night sky and that is what I’m aiming for.
Such photos take many hours to plan, execute and process. Locations are difficult to find, the time of year and moonphase must be right and the weather must be absolutely clear. It’s a lot of work for just one single image and I sometimes ask myself if it’s worth it. Every time when I get home and start processing the image I get my answer. The hours standing in the field, while the camera takes photo after photo transform into something beautiful. The results are so stunning and unique that I can’t wait to plan the next one. If you want to know how exactly I take those images, please read this or this behind the shot post.

Final Thoughts
This is a brief recapitulation of my personal journey through the world of astrophotography. There are many more topics out there that I haven’t touched yet but for now I am content with the progress I made over the course of the past few years.
If you’re a beginner in astrophotography, I hope this article gave you some insights and inspiration, helping you expand your knowledge and take better pictures of the night sky.
If you’re already an avid astrophotographer, maybe you could relate to my journey and look back at how you started, the progress you’ve made and where you are now.
If you’re not a photographer, hopefully you are still inspired to go out and enjoy the wonders of the night sky. The feeling of a night under the stars is hard to beat and only gets better the more you know about the night sky.